3/17/2012

Code Coverage

This is the seventh blog of a series of posts about the topics Continuous Integration and Continuous Delivery. It explains how important continuous integration is to deliver software in short iterations to the customer with a high quality standard.

Code coverage is a measure which indicates how much percentage of the code has been tested. There are different techniques but it usually describes how many lines of the code have been executed during the Unit Test and how many have not been. It does not say anything about the quality of the tests itself. Even a high percentage of Code Coverage does not help if the unit tests do not cover the use cases how the component / class is used. But it is a good indicator to find out which parts are tested at all and which have a lack of testing.

Enable Code Coverage
It can be easily activated in the Visual Studio Menu "Test", "Edit Test Settings" and select the Test Settings file.

After that the Code Coverage can be enabled on the "Data and Diagnostics" tab.


The assemblies which should be instrumented have to be selected by clicking the "Configure" button. It has to be checked that just productive assemblies are selected and no unit test projects.


Code Coverage Check during CI Build

A code coverage check can be implemented in order to ensure that a certain amount of unit tests are written and stay in a healthy state. It can check the code coverage percentage and fail the build if the value is under a defined amount. This prevents the tests from getting removed from the build because it would drop the code coverage value. Of course, this says nothing about the quality of the tests but it makes a least sure that the tests are executed and increase with the code basis.

The following example coverage output file is written during the build process if the code coverage has been enabled. The value can be checked reading the BlocksCovered and BlocksNotCovered nodes and compared to a defined value which is the criteria to fail the build or not.

<CoverageDSPriv>
  <xs:schema id="CoverageDSPriv">...</xs:schema>  
  <Module>
    <ModuleName>TSTune.CodeExamples.dll</ModuleName>
    <ImageSize>57344</ImageSize>
    <ImageLinkTime>0</ImageLinkTime>
    <LinesCovered>7</LinesCovered>
    <LinesPartiallyCovered>0</LinesPartiallyCovered>
    <LinesNotCovered>7</LinesNotCovered>
    <BlocksCovered>7</BlocksCovered>
    <BlocksNotCovered>6</BlocksNotCovered>
  </Module>
  <SourceFileNames>
    <SourceFileID>1</SourceFileID>
    <SourceFileName>OrderServiceProxy.cs</SourceFileName>
  </SourceFileNames>
  <SourceFileNames>
    <SourceFileID>2</SourceFileID>
    <SourceFileName>OrderManagement.cs</SourceFileName>
  </SourceFileNames>
</CoverageDSPriv>

In this simple example 7 of 13 blocks have been covered during the test, which is a code coverage of: 7 / (6 + 7) = 0.5385 = 53.85 %.

Coding Guidelines

This is the sixth blog of a series of posts about the topics Continuous Integration and Continuous Delivery. It explains how important continuous integration is to deliver software in short iterations to the customer with a high quality standard.

Many companies have written coding guidelines for the development which define naming, layout, commenting and a lot of other conventions. Even Microsoft has a couple of MSDN articles about coding conventions and design guidelines.

Coding guidelines are really important for the readability of the code and they can reduce the maintenance effort because the developer understands the code more quickly.

Many companies invest in writing documents about coding and design guidelines but the code does not follow most of the defined rules and the different components and classes have a completely different style. Just a document does not improve the code quality. The developers have to know the content of the document and have to follow it. The code has to be reviewed on a regular basis.

Usually, the guidelines document is just stored somewhere on a SharePoint or file share. It is also most of the time not up to date because another version of the programming language has been released. The new language features are not described or parts of the document are already obsolete.

This problem can be solved by using a tool like StyleCop. StyleCop checks during the build process if the code follows the defined rules. It can be checked, for instance, if all public methods are commented or every if-block is within curly brackets. The StyleCop rules can be defined instead of writing and updating the coding guidelines document. If the StyleCop rules are checked during the development process, some important time during the review can be saved. The reviews can focus on the architecture and design of the components instead of checking the style and naming conventions.

There are two ways to check StyleCop rules during the development process. Either via check-in policy or integrated into MS build. I would recommend to use the MS build integration because the check-in policy has to be installed on all develop machines and have to be kept up to date.

Integrate StyleCop into MS Build:
After downloading and installing StyleCop, there is a MS Build target in the installation folder:
StyleCop\<version>\Microsoft.StyleCop.targets

Just copy the file and check it in your source control. After that it can be referenced relatively in order to work on all developer machines.
<Import Project="..\StyleCop\Microsoft.StyleCop.targets" />

If the StylCop target is integrated in the MS Build, every violation is shown as a warning. In case you want to ensure the rules this might be not enough. I have seen projects with thousands of warnings in the build process. A warning is indeed not an error and the assembly can be still compiled but there are reasons why warnings are shown. That is why they should not be ignored. One possibility is to enable the build option "Treat warnings as errors". In combination with gated builds code cannot be checked-in anymore which do not fulfill the StyleCop rules.


But there is one big disadvantage in that approach. The developer cannot test easily changes on the code anymore because every time the violated StyleCop rules make the build fail. If, for instance, a new public method has been added and is not commented yet, because it is not finished completely, this code cannot be compiled and tested. That is the reason why I would enable this option just during the continuous integration build and disable it on the local machine. This can be done using different Configurations like in the following project file:

<PropertyGroup Condition=" '$(Configuration)|$(Platform)' == 'Local|AnyCPU' ">
  <TreatWarningsAsErrors>false</TreatWarningsAsErrors>
</PropertyGroup>
<PropertyGroup Condition=" '$(Configuration)|$(Platform)' == 'TFS|AnyCPU' ">
  <TreatWarningsAsErrors>true</TreatWarningsAsErrors>
</PropertyGroup>

3/16/2012

JavaScript Unit Testing

This is the fifth blog of a series of posts about the topics Continuous Integration and Continuous Delivery. It explains how important continuous integration is to deliver software in short iterations to the customer with a high quality standard.

Modern applications use more and more JavaScript to provide a rich and interactive user interface. Especially with HTML 5, JavaScript code is getting even more. I am wondering that JavaScript is still not taken as serious as most of the other programming languages. There is still not enough awareness that JavaScript code is an important part of applications and has to have a good code quality as well. I have seen projects which were writing a lot of server-side unit tests but had no quality assurance on the client-side.

The tools have been improved in the last couple years but are still not as intuitive as they should be. For instance, Visual Studio does not support Unit Testing of JavaScript code out-of-the-box. But at least there are already a couple of JavaScript Unit Testing Frameworks available.

In the following blog, different JavaScript Test Frameworks shall be tested and compared. It is focused on the TFS integration in order to execute the tests during the CI build.

Browser-based or Browser-less?

There are two different approaches, either the test frameworks are using a browser to execute the tests or the JavaScript code is interpreted and executed from a host application.

Browser-based Frameworks: QUnit, JS-Test-Driver, ...
Browser-less Frameworks: JSTest.NET, google-js-test, ... Crosscheck, ...

The browser-less frameworks can be executed usually pretty easy. Also the integration in CI builds is much easier because the overhead of starting and stopping a browser is not needed. But there is one big disadvantage with browser-less frameworks. The execution runs in a virtual environment and the different browser habits cannot be tested. Additionally some features are usually not supported by these frameworks. That is the reason why I prefer browser-based frameworks.

Writing JavaScript Tests can be tricky

In general, writing JavaScript Unit Tests is not as easy like testing server-side code, because usually JavaScript code is calling web services and interacting with the DOM of the browser. Of course, you can separate your JavaScript logic from the DOM interaction and service calls (and you should always do that!). But that does not change the fact that loading data and manipulating the DOM are the main tasks of your JavaScript code. If you would just test the pure JavaScript logic without DOM interaction, you would miss a big part of your code.

Mocking Ajax-Request

The first problem with AJAX service calls can be solved by using a mocking framework. If you are using JQuery, you just need to include the JQuery Mockjax library and you can easily redirect your AJAX calls to return the data you need for your test:

$.mockjax({
  url: 'testurl/test',
  responseText: 'Result from the test operation.'
});

This line hooks into the JQuery library and returns the given response text for all JQuery requests to the defined url. The response text can be simple text, JSON or any other content.

DOM Manipulation

The DOM interaction problem is more difficult. Almost in all cases, JavaScript code communicates and manipulates the browser's DOM. Asynchronously retrieved data has to be displayed in a certain way. This topic is also the most important task of a JavaScript unit testing framework (besides the test execution, of course).

There are different approaches to support the declaration of HTML markup for unit tests. The most frameworks like QUnit for example, need a real HTML document for the test execution. The unit tests are written within this document and executed by simply loading the document. The results are shown afterwards by the testing framework within the browser as HTML output.

This approach has two big disadvantages:
  • All the tests have to work in the context of the HTML page. The JavaScript unit tests usually highly depend on the HTML markup. If a lot of different cases have to be tested, a new HTML page has to be created each time. These pages are usually just slightly different but cause a lot of troubles and effort in the test maintainance.
  • The test results are usually shown as HTML output in the browser and cannot be automatically processed. But this is very important to fail the Continuous Integration Build and deny the check-in.

But there is JS-Test-Driver, a tool especially made for the integration of JavaScript unit tests in CI builds as well as an easy definition of HTML markup. It makes it much easier to execute JavaScript unit tests within a CI build and to reduce the effort to write tests.

JS-Test-Driver

JS-Test-Driver is a great Unit Testing framework, which supports inline definition of DOM elements and a seamless integration into the Continuous Integration build.

The HTML markup for unit tests is not written in a separate HTML page. It can be defined with a special DOC comment, e.g. /*:DOC += */. The html document is automatically created and can be used within your test case.

TestCase.prototype.testMain = function() {   
  /*:DOC += <div class="main">
</div>
*/   
  assertNotNull($('.main')[0]); 
};

That is the reason why js-test-driver is my favorite Javascript Test Framework. It scales like a charm and allows to define HTML tags within the tests. Additionally it can be easily integrated into the build process.

Configuration of JS-Test-Driver:

The following script shows how to configure JS-Test-Driver. It is quite self-explaining. The "server" declaration defines the binding for the started server. "load" defines which scripts should be available during the tests. "test" defines where are the unit tests located. Additionally plug-ins like code coverage calculation can be integrated as well.

server: http://localhost:4224

load:
 - Script/Main/*.js
 - Script/Page/*.js

test:
 - Script/UnitTests/*.js

plugin:
 - name: "coverage"   
   jar: "coverage.jar"   
   module: "com.google.jstestdriver.coverage.CoverageModule"

Integrate JS-Test-Driver into Team Foundation Server Build

JS-Test-Driver starts a server and a browser instance, runs the tests for you and posts the result to the server. The result can be evaluated during the CI Build and check-ins can be even rejected when just one test-case fails. After that JS-Test-Driver is also shutting down the server and the browser.

To integration JS-Test-Driver into the TFS Build a configuration file (like above) and a build target has to be created:

<?xml version="1.0" encoding="utf-8"?>
<Project xmlns="http://schemas.microsoft.com/developer/msbuild/2003">
  <PropertyGroup>
    <!-- SolutionDir is the dir, where the solution file exist -->
    <SolutionRoot>$(MSBuildStartupDirectory)\..</SolutionRoot>
  </PropertyGroup>

 <Target Name="JSTestDriver">
    <PropertyGroup>
      <JSTestDriverJar>$(SolutionRoot)\JsTestDriver\JsTestDriver-1.3.4.b.jar</JSTestDriverJar>
      <JSTestDriverConfig>$(SolutionRoot)\JsTestDriver\jsTestDriver.conf</JSTestDriverConfig>
      <BrowserPath>C:\Program Files (x86)\Internet Explorer\iexplore.exe</BrowserPath>
    </PropertyGroup>

    <Exec Command='java -jar "$(JSTestDriverJar)" --port 40000 --basePath "$(SolutionRoot)" --browser "$(BrowserPath)" --config "$(JSTestDriverConfig)" --tests all --verbose' />
  </Target>

</Project>

This target starts JSTestDriver and can be easily executed from the local or TFS build:
build JSTestDriver

The screenshots show how the JSTestDriver target can be added to the TFS build workflow XAML. The MS Build activity uses the JSTestDriver target to start the Java jar-file and executes the javascript unit tests. If one of the tests fails the MS Build activity returns an error and therefore also the build fails. If the gated check-in is enabled, the code is not committed in the code basis until the tests are fixed.


1/04/2012

.NET Unit Testing

This is the forth blog of a series of posts about the topics Continuous Integration and Continuous Delivery. It explains how important continuous integration is to deliver software in short iterations to the customer with a high quality standard.

In my previous post I was explaining what role a CI build plays in the development process. Also Gated Check-in's are really important to ensure a certain code quality. But this quality highly depends on the checks and tests which are running during the CI build.

Writing unit tests and integrating them into the continuous integration build is essentially for writing code with good quality. Always assume that your code is not working until you have proven that it works by a unit test.

Software has to be permanently adapted and changed due to new requirements. That is the nature of software development because humans cannot overview the complexity of IT systems. That is also the reason why iterative and agile development processes are so successful compared to traditional waterfall and V-models.

But how to write good unit tests?
I have seen a couple of projects with totally different ideas and solutions how they created and organized their unit tests. One main goal and very important technique for writing successful unit tests is to keep the scope for a test very small. In other words just test a single class or even better a single method per test. What sounds pretty easy in theory can be challenging in the practice. Introducing unit tests in existing projects which have already a net of references can be very tricky. A good practice is to improve the code step by step. Every check-in has to make the code better. When you start a new project it is much easier to introduce good unit tests with a little effort and discipline. Patterns like inversion of control and dependency injection are techniques to reduce the dependencies between components without introducing more complexity. Do not try to write unit tests which test all your layers at once. This results in high effort for building and maintaining the test data and unit tests during the software lifecycle. Better introduce local unit tests step by step.

Here is a list of simplified best practices which can be applied in most of the cases to reach easily a looser coupling and therefore a better testability:
1. Every time you want to call another class add the interface of the class in the constructor of your class and store it as a field or property and call the interface instead of the class directly. If the class you want to call does not have an interface, what stops you from creating one? Tools like Visual Studio and ReSharper even support you doing that easily. If it is external code
just create a wrapper around this code which is anyhow a good practice to integrate external code in your application.

Assuming you want to test your business logic OrderManagement but unfortunately your business logic calls a web service through your OrderServiceProxy class. That makes testing your business logic much more difficult because every time the web service is not accessible your unit test would fail. We just add a new interface IOrderServiceProxy and add a constructor taking this interface in the Order Management class.

public class OrderManagement : IOrderManagement
{
    private IOrderServiceProxy OrderService { get; set; }

    public OrderManagement(IOrderServiceProxy orderService)
    {
        OrderService = orderService;
    }

    public bool ProcessOrder(Order order)
    {
        return OrderService.PlaceOrder(order);
    }
}


2. Now you can easily test your OrderManagement class und ProcessOrder method because you can pass a replacement for the OrderServiceProxy implementation and test against your dummy implementation.

public class OrderServiceProxyMock : IOrderServiceProxy
{
    public bool PlaceOrder(Order order)
    {
        return true;
    }
}

[TestClass()]
public class OrderManagementTest
{
    [TestMethod()]
    public void ProcessOrderTest()
    {
        // Create mock class
        IOrderServiceProxy orderService = new OrderServiceProxyMock();

        // Create test data
        Order order = new Order();
            
        // Create your class to test and pass your external references
        OrderManagement target = new OrderManagement(orderService);
            
        // Execute your test method
        var result = target.ProcessOrder(order);
            
        // Assertions
        Assert.IsTrue(result);
    }
}


3. You can use a mocking framework like RhinoMock, Typemock, Justmock, NMock, etc... to simplify testing your code and reduce the lines of code you have to write.

RhineMocks example:

[TestClass()]
public class OrderManagementRhinoMocksTest
{
    [TestMethod()]
    public void ProcessOrderTest()
    {
        // Create test data
        Order order = new Order();

        // Create mock
        MockRepository mock = new MockRepository();
        IOrderServiceProxy orderService = mock.StrictMock<IOrderServiceProxy>();
        orderService.Stub(x => x.PlaceOrder(order)).Return(true);
        mock.ReplayAll();
            
        // Create your class to test and pass your external references
        OrderManagement target = new OrderManagement(orderService);

        // Execute your test method
        var result = target.ProcessOrder(order);

        // Assertions
        Assert.IsTrue(result);
    }
}


4. You can use Dependency Injection Frameworks in order to inject the implementations in the constructors. Especially for your productive code you have in most of the cases just one implementation for an interface which can be easily mapped. There are a lot of Dependency Injection Frameworks available like Unity, StructureMap, Spring.NET, etc...

A dependency injection framework resolves the interfaces you placed in a constructor or property with the real implementation. Which interface maps to which implementation can be either configured in a xml file or just coded.

Unity Configuration example:

First you usually define your alias which maps to a full qualified type name. You have to do that for your interface as well as your implementation. After that you can register a mapping from the interface to the actual implementation.

<configuration>
  <configSections>
    <section name="unity" type="Microsoft.Practices.Unity.Configuration.UnityConfigurationSection, Microsoft.Practices.Unity.Configuration" />
  </configSections>
  <unity xmlns="http://schemas.microsoft.com/practices/2010/unity">
    <alias alias="IOrderServiceProxy" type="TSTune.CodeExamples.ServiceAgents.IOrderServiceProxy, TSTune.CodeExamples" />
    <alias alias="OrderServiceProxy" type="TSTune.CodeExamples.ServiceAgents.OrderServiceProxy, TSTune.CodeExamples" />
    <alias alias="IOrderManagement" type="TSTune.CodeExamples.BusinessLogic.IOrderManagement, TSTune.CodeExamples" />
    <alias alias="OrderManagement" type="TSTune.CodeExamples.BusinessLogic.OrderManagement, TSTune.CodeExamples" />
    <container>
      <register type="IOrderServiceProxy" mapTo="OrderServiceProxy"/>
      <register type="IOrderManagement" mapTo="OrderManagement"/>
    </container>
  </unity>
</configuration>


After you configured your unity container you have to load the configuration and initialize your unity container before you can use it:

IUnityContainer unityContainer = new UnityContainer();
UnityConfigurationSection section = (UnityConfigurationSection)ConfigurationManager.GetSection("unity");
section.Configure(container); 


Unity Code example:

You can also register the mappings using code, which is much easier:

IUnityContainer container = new UnityContainer();
container.RegisterType<IOrderManagement, OrderManagement>();
container.RegisterType<IOrderServiceProxy, OrderServiceProxy>();


But this approach has two disadvantages:
First of all you have to recompile your code to exchange implementations. Secondly a static reference has to be added to all the assemblies you want to register, because the classes have to be known during registration. This can be problematic when you use the Visual Studio Layer Diagram Validation, which I am going to explain in one of my next posts.

Unity - How to use it:

Every time you call now UnityContainer.Resolve<IOrderManagement>(); you will get an instance of your OrderManagement class.

var orderManagement = unityContainer.Resolve<IOrderManagement>();
orderManagement.ProcessOrder(new Order());


5. If using a Dependency Injection Framework is too much of a pain for you (which it should not!), then you can add a default constructor which wires up all implementations with the interfaces. This is called poor man's dependency injection.

public OrderManagement()
{
    OrderService = new OrderServiceProxy();
}


If you are using interfaces instead of real implementations you lose the chance to easily navigate with F12 through your code during design time. Instead you end up looking at the interface
when you want to investigate the implementation and you have to search the actual implementation manually. ReSharper helps you navigating directly to the implementation by clicking Ctrl+F12.

How to integrate in the Team Foundation Server Build:

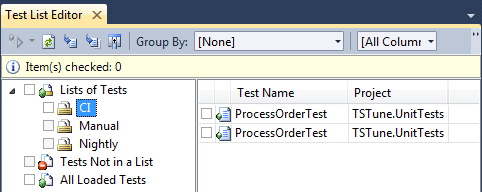
First, you should create your test lists. Usually there is a test list for CI, Nightly and maybe Manual tests.


After you placed your unit tests in the test lists, you can set up the TFS build to execute your test list in the CI build. Do not forget to fail the build if the test execution failed.


Final important note !!!

Think about unit test code like productive code. Use the same quality criteria. Unit test code has to be maintained together with your productive code and underlies the same changes!

This makes writing and maintaining of your unit test code much easier and increases the quality of your code.

CI and Nightly Builds

This is the third blog of a series of posts about the topics Continuous Integration and Continuous Delivery. It explains how important continuous integration is to deliver software in short iterations to the customer with a high quality standard.

In this post I am going to show how to create builds with the TFS 2010 Build Workflow Engine. To ensure code quality and enable continuous delivery, we have usually two different types of builds: CI and Nightly Builds.

CI Builds are executed during the check-in of the developer. There are 3 types of CI builds:
  • Continuous Integration Build - Every check-in of the developer is build, but the code is always committed even if the build fails. Even code which is not working correctly will be stored in the productive source control.
  • Rolling Builds - Builds a set of check-in's which have been committed since the last build. It has the same disadvantage like normal CI builds and on top it is not all the time clear who created the faulty code.
  • Gated Check-in Builds - This type of CI builds just commit the code in the main source control when the build is green and every quality check has been successfully passed. This gives the possibility to ensure certain criteria's and forces the developer to adapt the code if just one of rules in broken.

The task of CI builds is to ensure the code quality. This works great with Gated check-ins because it does not allow to check-in anything which is not according the defined quality criteria.


Nightly Builds are used for integration tests which take a longer time to execute and it would not be feasible to execute them during each check-in process. The Nightly Builds are triggered on a certain time. A good example are Coded UI Tests, which test the user interface by performing clicks and other actions on controls of the screen. A usual practice is to deploy the application every night to the target system and performing completely automated integration and user interface tests.

Overview about a possible development process to prevent broken applications:
  • CI Build (with Gated Check-in) on every code change
  • Nightly Deployments to Development System
    In order to execute integration and user interface tests it is important to establish a completely automated deployment, which can be executed during the night. After that the automated tests can be executed and instant feedback can be given every morning. It is important that the automated integration and user interface tests cover the main functionality of the application and ensure the health of the application. Additionally, the customer should not test on this system, because it can be broken every morning.
  • Weekly Deployments to Staging System
    Only when CI Build, integration and user interface tests have been successfully passed, an automated deployment can be triggered for the staging system. After that the automated tests shall be executed on this system again, in order to ensure the health of the application and prevent configuration errors.
    In that case the customer gets always a stable version on the staging system and can focus on reviewing the implemented requirements.
This process should help to ensure that the customer does not see a broken application and should be much more satisfied about the software quality.

1/03/2012

Why to force so many check-in rules during the CI build?

This is the second blog of a series of posts about the topics Continuous Integration and Continuous Delivery. It explains how important continuous integration is to deliver software in short iterations to the customer with a high quality standard.

Why to force so many check-in rules during the CI build?

The reason seems pretty simple: I have seen over and over again in the projects I was working that every rule which is not enforced during the check-in process will be broken sooner or later.

Usually, this is not done on purpose. There are multiple reasons for that. Most of the time due to high time pressure in the projects or because the developer is deeply focused on the current task and forgets just about it. But the rules and guidelines can also be misunderstood or just forgotten when definitions are discussed in a meeting or send as mail.

Another reason for check-in rules is that this approach saves a lot of time and money because problems are detected before they are actually integrated in the main code. During the architecture and code reviews, the architects can focus on other more important things than static dependencies and code metrics.

In general, every important change in the design of the application is forbidden by check-in rules. It will be all the time an explicit change and not done by accident without noticing it. A good example for that is ReShaper. It is a great tool of course, everybody should have it. But it has a feature, for instance, which detects the namespace and assembly when you just type-in the class name. It automatically adds a reference to the assembly in the current project. I often catch myself adding unwanted references while I am coding and trying to solve my local problem.

All of these problems can be avoided by using good static analysis tools during the check-in process:

Another good approach is:
When you find a problem in a code review, you can create a rule which detects this violation in the future. It is like writing unit tests to check the software architecture.

1/02/2012

Continuous Integration and Continuous Delivery

This is the first blog of a series of posts about the topics continuous integration and continuous delivery. It explains how important continuous integration is to deliver software in short iterations to the customer with a high quality standard.

Everybody of you faced for sure problems with incomplete or just bad specifications. Additionally a software has to be frequently changed due to new or updated requirements. That's why agile software development processes and techniques are so successful. But a good agile software development processes also implies a continuous delivery to the customer in my opinion. Only like this it is possible to verify if the features match the customers thoughts. But the software can or should be just delivered if it fulfils the quality standard.

I think (almost) everybody delivered already a piece of software which was crashing on the first use. This is frustrating for the customer and gives also a bad picture about the development team. And that is exactly where continuous integration comes into play. It ensures a certain defined quality standard and enables the possibility to define quality gates in order to prevent crucial software failures.

I would like to give you some hints what is important about continuous integration and how you can set up a configurable team foundation server 2010 build workflow with a lot of features and quality gates to ensure a software which works and fulfils the customer needs.

The following build workflow steps will be covered in the next posts:
I am going to explain how to set up each build process, the reason for each step as well as pros and cons.

After that I want to focus on the Delivery Process and which challenges are waiting in this area: